

Today it is my turn to offer a tutorial for the Hands 2 Help Challenge!
My most favorite block and my Go to is this simple Churn Dash block made with all 5 inch squares:
Fabric Requirements for Block

·
5 – Print
5 inch Squares
·
4 –
Background 5 inch Squares
Save 1 Print 5 inch square for the Center of the Churn Dash.

Take Two of the background fabrics and draw a diagonal line along the Back of the fabric, I also drew ¼ inch to the side of the center line so you can see where your stitch lines should be. ( I did this only for the example)
Pair them with a print piece.
Stitch on both sides of the center line
Lay your ruler along the Center line and slice
You will get 4 - 4 ½ inch Half Square Triangles


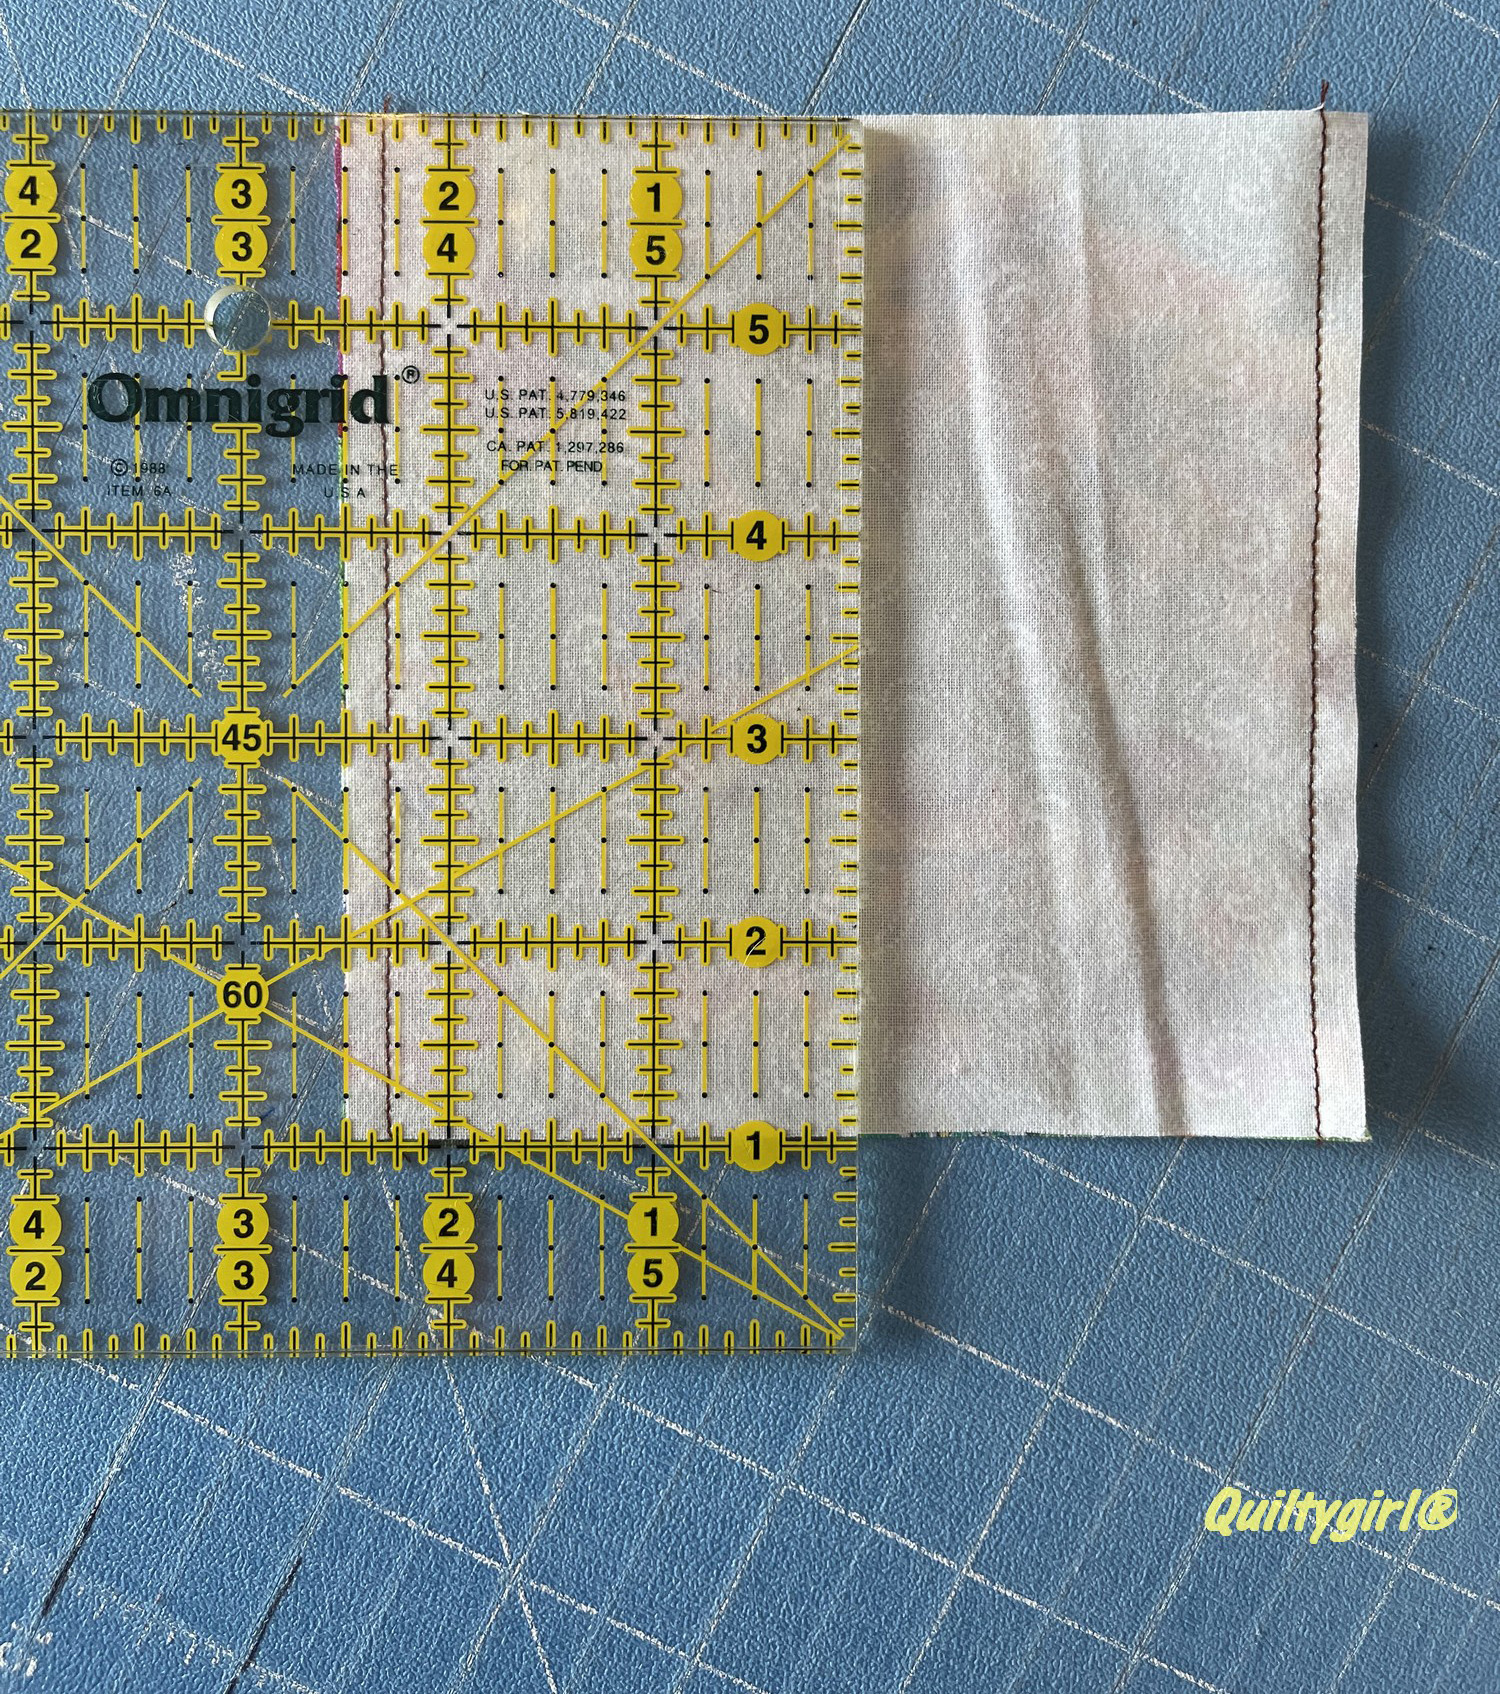
Take the last two print and the last two background squares
Pair them right Sides Together.
Stitch on the right and left side ¼ inch in. ( again I drew just so you could see)
Once both side are sewn – measure in 2 ½ inches and slice .
You will get 4 – 4 ½ x
5 in rails
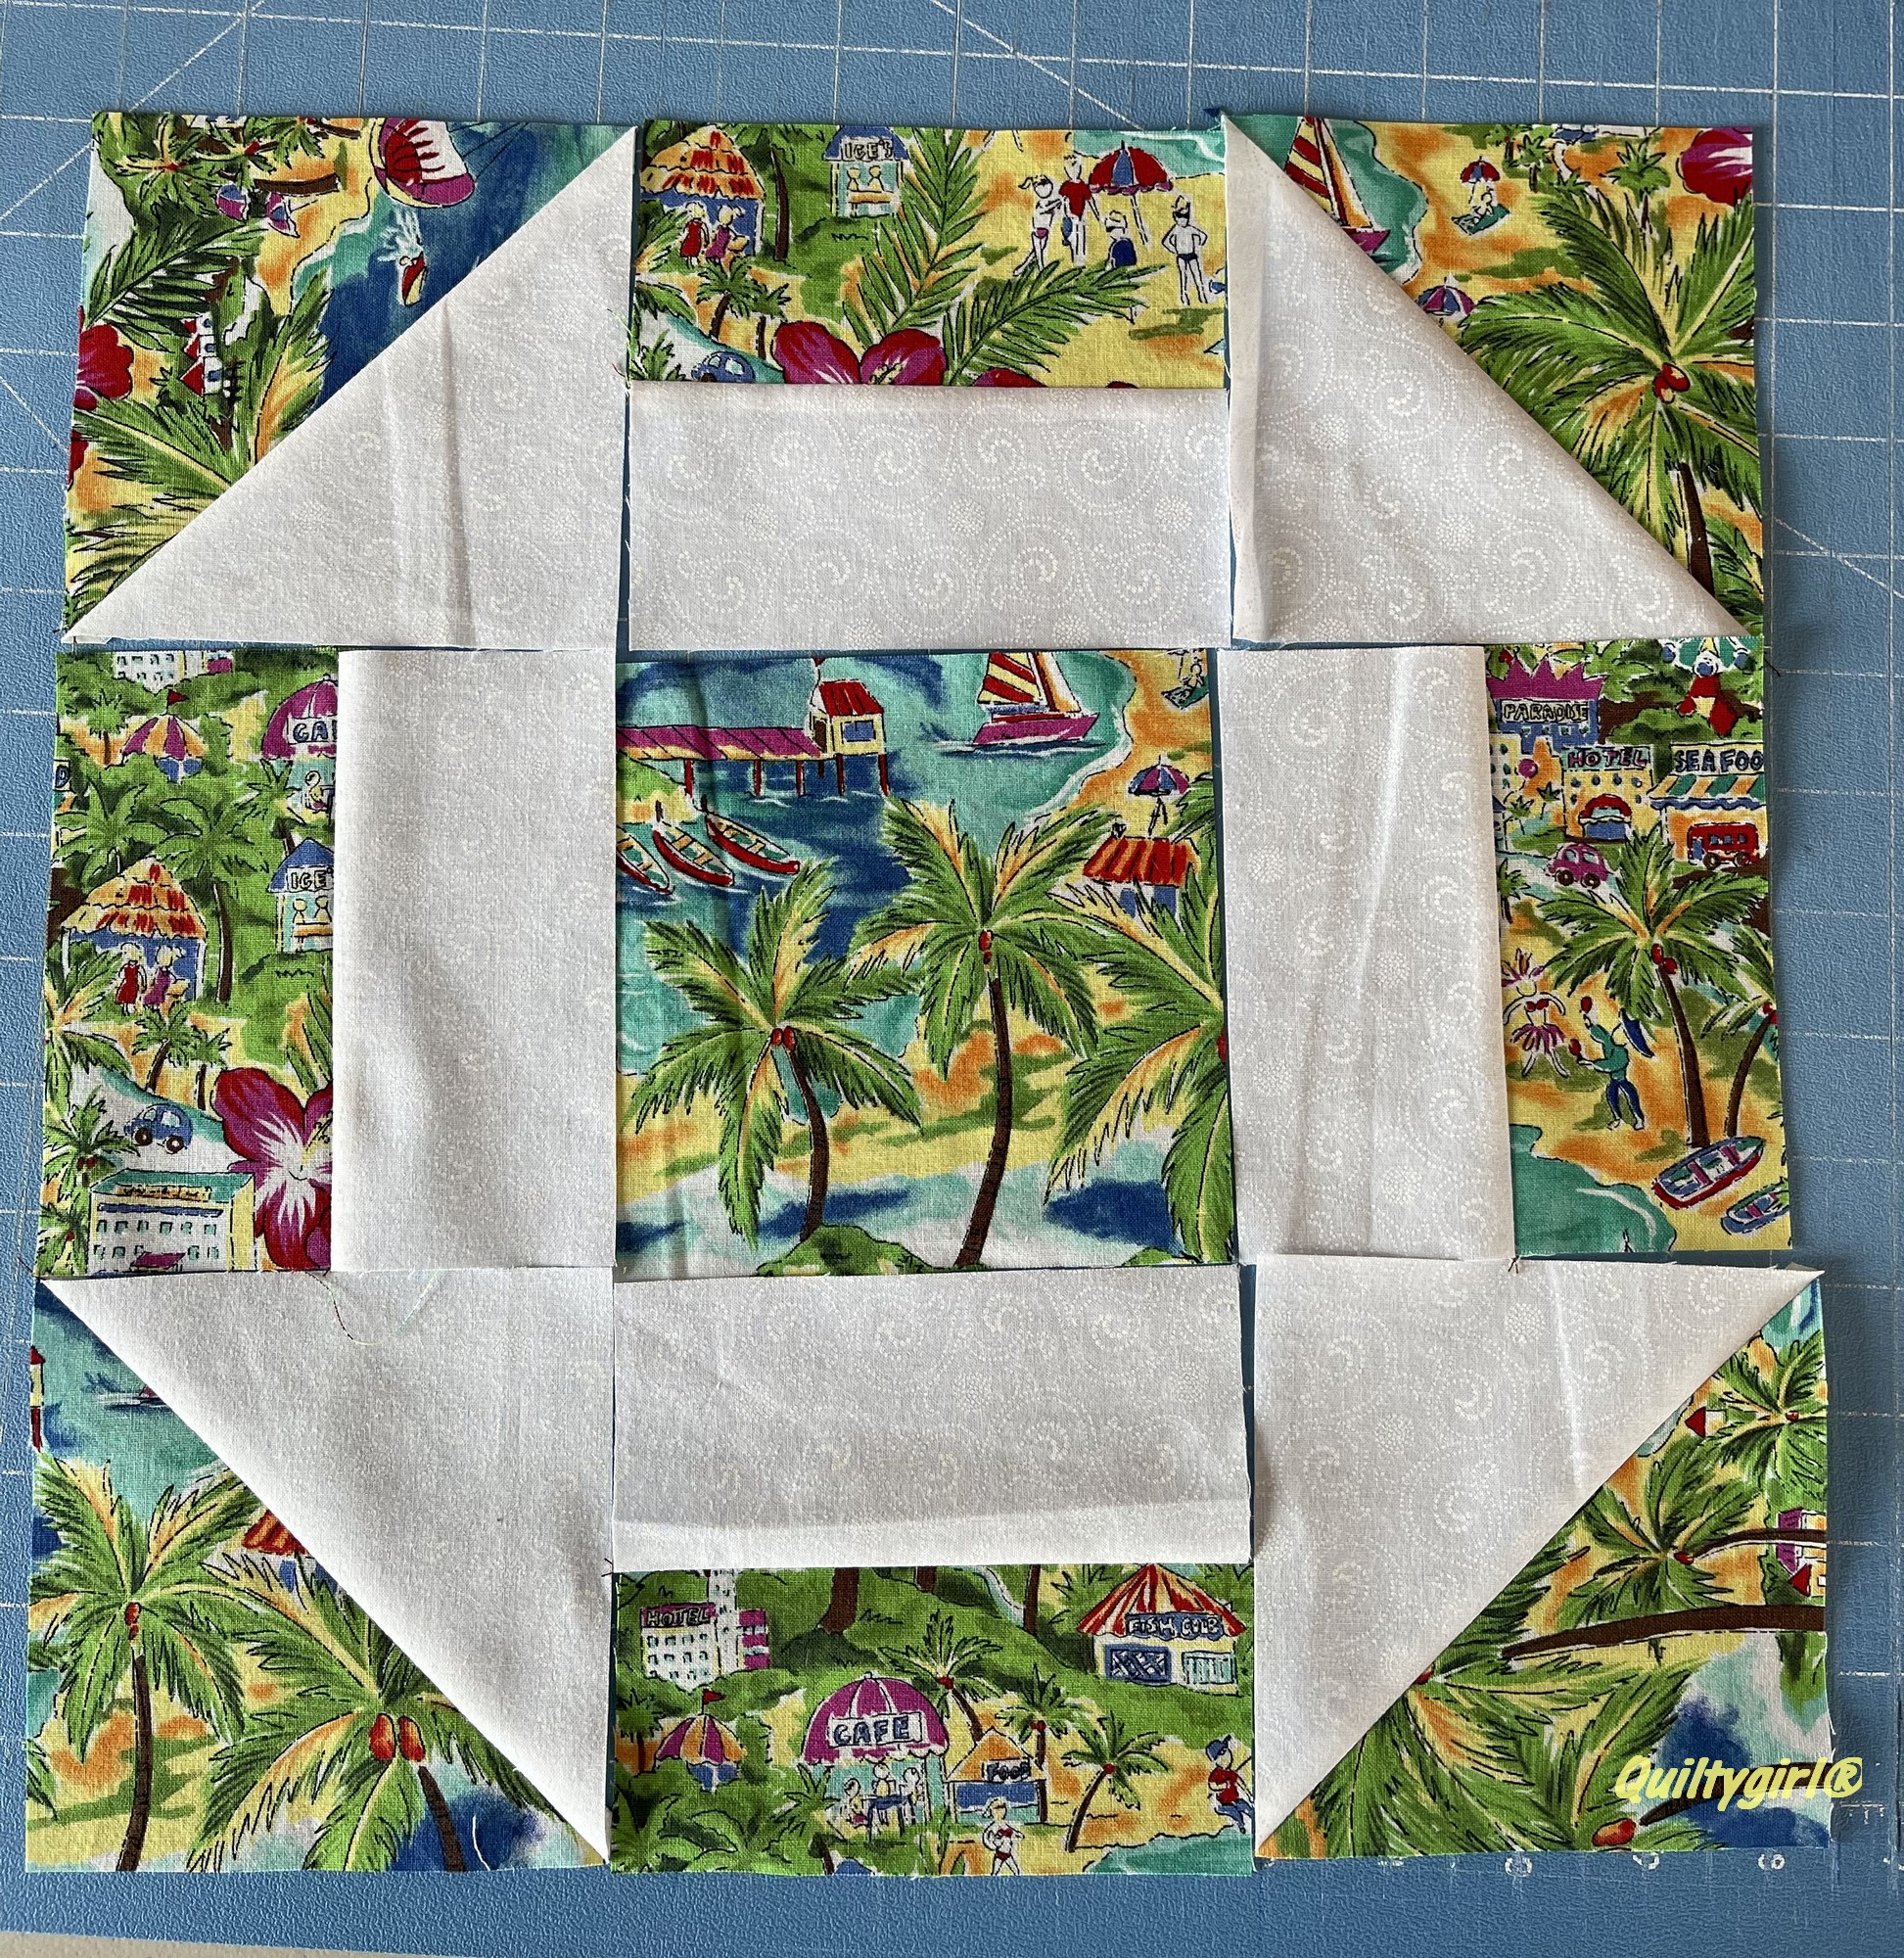
Iron all of your pieces and then lay them out like so:
Stitch the pieces together into three rows.
Press.
Stitch the three rows together
Press
And you will have a
13 inch block!
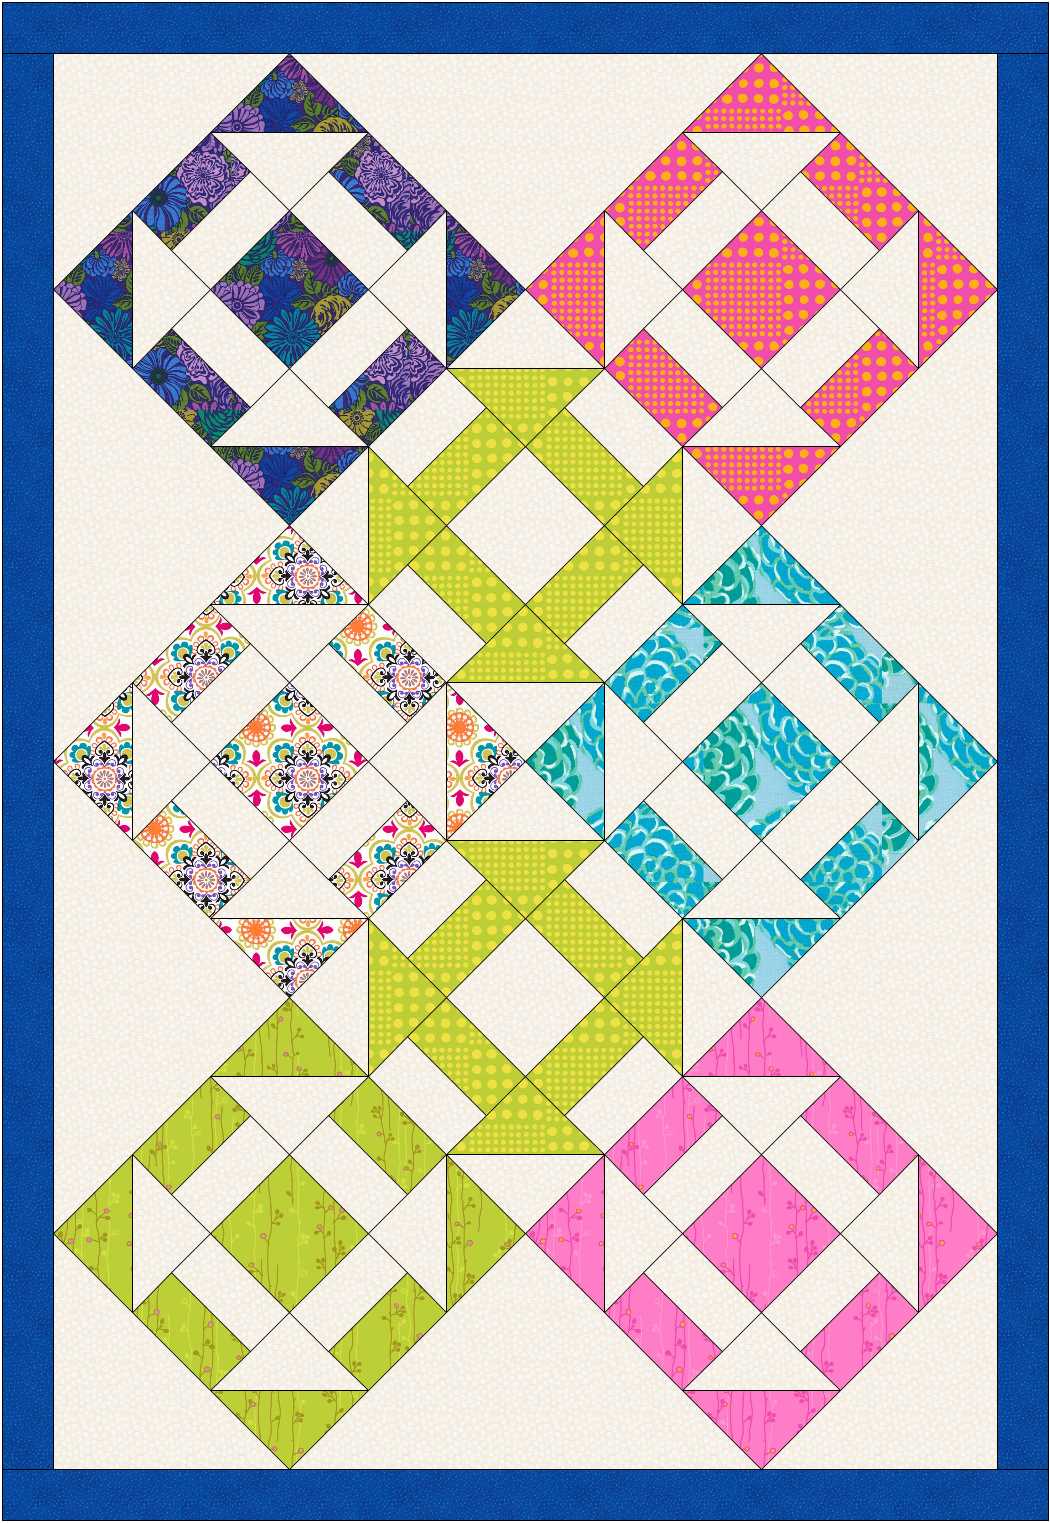
For A Cute Quick
Baby Quilt
37.5 x 37.5

You will make 4 blocks as shown, then make 1 just the opposite

Slice it on both diagonals to yield 4 setting triangles
Then for the corner pieces:
Cut 2 – 9 ¾ squares of background and slice on one diagonal.
Stitch them in rows and add a border. I added 1 ½ inch strips in this one – but if you want to make it a tad bigger, you can add a bigger border.
For a little bigger toddler/Cot quilt 37.5 x 55 inches
add 3 blocks - the setting triangle sizes remain the same ;-)

Not a fan of setting blocks on point?
Make 12
blocks and set them together. Add a 1 ½ inch border
It will measure 39.5 x 52 inches
Now to some fun examples of Churn Dash Quilts I have made in the past!

And the this one - I used ALL scrappy pieces. I just made half squares and rails until my heart was content, then I made them into blocks, not paying attention if the reds and blues were built into one block.
The scrappiness of it made my heart happy

Alas - Here is the PDF for you:
Churn Dash Block Tutorial ( click that link to the left)
I love to write patterns - so check out all the others I have written in my Quiltygirl Store as well as the tab in the header above.
I hope you use one of these ideas for a Hands 2 Help quilt this year!
Thanks to Academic Quilter for Hosting this year!!
17 comments:
Churn Dash is one of my top 5 favorite blocks. I like it on point as well as straight. Thanks for the tutorial - I just downloaded it!
Thanks Alycia! I always forget about the sewing-the-sides technique so this time I've saved it!
Churn dash blocks are such fun to make, and perfect for a donation quilt!
I never thought to sew the rails that way. And I LOVE the super scrappy last quilt. Uh oh...I feel a squirrel coming. And I'm just trying to get my H2H quilt together. Not ANOTHER one! Oh well..
Sweet! I love the panel version!!!
I don't know why I don't make churn dashes since I love them and they are simple to make. Thanks for your tutorial.
Great project, Alycia. Churn dash is always so versatile. Love on point settngs too, a perfect playground for quilting. Thanks for your contribution.
Thanks, Alycia - appreciate the pdf for the tutorial!
Thanks for all the options. I need more practice setting on point. This will help!
I feel a baby quilt coming on!
Wonderful tutorial - thank you Alycia!!!
Brilliant tutorial and suggestions. I’ve never made a churn dash this way but it sure makes more sense then cutting the rectangles separately and then sewing them together. I really like your suggested sizes too. I have a few smaller panels that these might go with. Must check later today…. Thanks
Thanks Alycia. This is will make a cute baby quilt.
Thanks for sharing your churn dash tutorial! All your churn dash quilts look awesome!!
Thanks for the tutorial and sizing suggestions, Alycia!!
Thanks for this really great tutorial. You make HST's look sooo simple!! Thanks! And thanbks for participating in the Hands2Help Challenge. A great opportunity to make people smile.
It's a favorite of mine and you explain the block in all of its glory!
Great tutorial! Love the Churn Dash and may try to do one of these for H2H or a guild charity.
Post a Comment