Sunday, June 15, 2008

Not so Top Secret Project Quilted


Sometimes things just go my way and all sorts of tasks get done. I am even amazed... as it didn't seem to start that way. I had a customer quilt on my machine that should have been done last week - but it kept going and going and going. Oh - it is such a beautiful quilt... But huge ( especially compared to the quilts of Valor).

~ Saturday nite I finished it up enough to take it off so I can turn the border and I loaded my Not so Top Secret Project quilt on the machine. This morning my Husband wanted to sleep in ( a little) for Fathers day - coming from a 5am kind of guy, I thought okay - you sleep I'll quilt... and I DID!!!

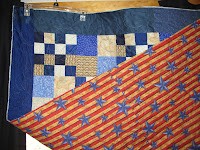
~After he woke up we headed to town for church, some ice cream, and some swimming and came back... and I ran down to quilt some more.... and Look what I finished! I used the new batting from Quilters Dream called Dream Green - it is made from recycled Plastic Bottles and I saved 13 bottles from going into the land fill. It was very nice to quilt, feels just like a polyester batt, not a whole lot of fuzz... so so far it gets an A rating in my book.

Have a good one!

Saturday, June 14, 2008

Heartstrings Quilt of Valor and blocks


The squishie ( that was actually a box) I got in the Mail from my Heartstrings http://www.heartstringquiltproject.com group had 2 quilt tops, String Blocks from Helen in the UK, string blocks from Jeanne, and a pile of blocks from the block bank..ALL of them patriotic! Oh and there was a backing piece that will look great on the back of the Red White a Blue Top. It is light blue with Eagles on it.
~
I can't wait to get these quilted and off to my binding volunteers... I think they make be just a little shocked and the number of quilts that will be coming their way! But I know they can handle it.
~
Now for the blocks... I am going to go work with my Moms group of ladies next week, and my sons are coming with me. Two of them work my machine rather proficiently ... so putting these blocks into rows is going to be their challenge. That should keep them busy for a while. The layout always take some time with 3 boys having to agree!!
~
Hope you all have a great weekend. Ours looks to be warm - in the 90's so it should be a great working weekend. We are off to the hay auction in a little bit, and then whatever else needs to be done ;-) I have everyone convinced that we should be down in the basement later this evening.. so maybe I will get to quilt after all.....

Thursday, June 12, 2008

Kids and Quilts of Valor

On Monday and Tuesday I spent the days at my Mom and Dads Church helping out with their Vacation Bible School. They wanted to do a Community Service project and so my Mom volunteered me to teach them about QOV. It was actually very fun and the kids were way to cute. They seperated them into 2 different groups - 4 to 1st grade, and 2nd grade to 6th grade.
~
I had kind of forgot about the attention span of the youngest group. I found I had a lot in common with them. You have GOT to keep things moving or they start moving!
~
I got to spend some time telling them about all the soldiers that get these quilts and of course they wanted to make one. So we used crayons and markers and they colored these blocks. One of the ladies at Church had sewn all the borders around the blocks for us. After the kids made the blocks then they got to make get well cards and letters too. They were just adorable.
~
In the top pic you can see one of the quilts put together already.. The pictures were just wonderful. There was a soldier with a helmet, there was a robot, a transformer car, a flag, stars, a soldier climbing a hill... what great artists we have!
~
We made enough blocks for 3 more quilts! So Stay tuned for the finished product!
~
Anyways - didn't want you all to think that I might get bored over the summer.. and miss all the kids at school. I have found them elsewhere ;-) ( or rather they found me - but it works!)
~


Wednesday, June 11, 2008

Quilt Challenge

I am back!! And I love the mail! This morning I went in to my post office and found 2 boxes for me!
~
One of the groups I am in has stepped up to help me meet the 100 quilt challenge that Chaplain gave us. The group actually issued a challenge to all of us to see if we couldn't get 400 quilts to cover all the soldiers in the one unit that we support. Oh wow.... something I think I learned - you should never challenge a quilter... they win ;-) . In this case it will be the soldiers that win.
~

Today I got a wonderful box from Carol in IN. It had TWO quilts in it for Quilts of Valor! And of course - you NEED a picture right????? She said the Patriotic one was from an auction and the other one she made. I think they are both wonderful!
~
I also got another box - so I will share photos of that one tomorrow!
~
Hope you all are having a quilty day!
Alycia

Saturday, June 07, 2008

Not so Top Secret Project Step 4


The LAST STEP!
Now you are going to take your blocks and put them into rows. I am a pretty random sew'er . So I made a pile of 16 patches and a Pile of 4 patches and sewed 3 sets of them together. I then would take those to the ironing board, press them and then sew them into a strip. I am SURE there are many more ways to do this - but this way brings on the Instand Gratification that I like!!
~
Your rows should be 6 blocks wide.
After all the rows are done ( you should have 7) , I turn them every other direction and start sewing the rows together. And Voila - there is the center of the top!
~
Remember those 4 1/2 inch strips you cut for the border? Well again - I am sure there are many ways to do this... but how I do it is:
I measure the center of the quilt vertically, then I sew the strips together to make this length and apply those borders. Then I press and do the same thing vertically. If for some reason the center is less that the edges of the quilt - this gives me a chance to ease in the fullness for a more square look. That said I AM NOT the quilt police, and therefore am not perfect ( I just pretend to be in front of my sons!).
~
So What do you think? Won't it make a nice Quilt of Valor?
~
Someone asked about Pieced Backings (but there return email was not turned on) I LOVE Pieced backings. I think they add a lot of interest to the quilt and I love wide backs too... (I'm simple)
~
If you are so inclined to send me the top or the finished quilt to deliver to the soldiers - I would love it! My Address again is:
Alycia Quilts
31544 Hwy 34
Kersey CO 80644
~
Have a good rest of your weekend folks... I am teaching 60 K-5th grade kids over the next 3 days how to make Quilts of Valor... so I might possibly be pretty exhausted.. so if you don't hear from me.. that is why... Wish me luck!


Not so Top Secret Project Step 3


The 4 Patch Block:
This is the easy block and it goes together rather quickly.
Step 1: Sew your Dark Strips to yur Light Strips, right Sides together. Take then to the ironing table and press them. I press mine again towards the dark side.
~
Then take the strips to your cutting table and cut them into 4 1/2 inch sections. With 22 inch Fabric - you will get 4 sections per strip set, with the WOF you should get 9 sections per set.
`
Take the sections and sew them into the 4 patches. With mine I got 22 Blocks. You only need 21 blocks. So I am going to save mine and if you feel like sending your extra block along with your quilt I will put them into another one. But if not - you can use this as a label, or incorporate it into the backing.
~
So now you should have 21 4 patch blocks and 21 16 patch blocks.
Tonite I will try to post the last step - so you will have it all at your fingertips - and can finish it whenever you have time.
~
Have a great day - Little Bit and I get to go shopping this afternoon - so we may have to make a detour to a fabric shop - just for fun!


Thursday, June 05, 2008

Not so Top Secret Project Step 2

On we continue with the 16 patch block.
~
You need to take your Dark and Light little two patches and place the right sides together, opposite colors together. I put mine together and make sure they are matching at the middle seam. In my head this makes them more square, and if I have to trim I am not messing up the center seams.
~
Again - I chain piece. I put them thru the machine and just let the pile grow in the back. Then when I am done I go clip them and take them to the ironing board. Press them with the seam to one side.
~
Then we will sew one 4 patch to another 4 patch - to make the top half of the block. Again I chain piece. This chain pieceing is usually where I pop in a quilting DVD - my new favorite that I picked up at MQS is a quilting DVD from Kimmy Brunner ( htttp://www.kimmyquilt.com) ... and if I want to drive the men outside I put in a chick flick - I watched "Someone Like You" while I was testing my first one. It was So so....
~
So after you have all the 4 patches sewn to another 4 patch you get well - this pic on the right ( is it an 8 patch?) Again - take them to the ironing board and press the seams to the left or the right.


~
Then we join the 8 patches to another 8 patch and voila - your 16 patch is all sewn. After you have sewn these all together - head back to the ironing board and press this seam. You should have 21 ~ 8 1/2 inch 16 patch blocks when you have finished this step.


~
It is a lot of fun to see the enthusiasm for the Quilt of Valor project grow. It really makes my heart happy. I know that the look on the soldiers faces when they recieved there quilts is truly priceless. I have recieved numerous emails from "our" soldiers telling me what the quilt means to them - and it makes me so glad! ~

Look at this face... Doesn't she look happy?
Have a great day! Enjoy your quilting!

Alycia


Wednesday, June 04, 2008

Not so Top Secret Project Step 1

Step 1 - the 16patch Block
~
We are going to take all of the 2 1/2 inch strips and sew them together. Take One Dark Strip, place it pretty side up. Take one light strip place it pretty side down on top of the dark. This is called faced together. Place them under your sewing machine and using 1/4 inch seam sew the strip together.
~
I like to chain sew, so I will sit and sew all of the 2 1/2 strips together at one time. I stitch to the end of one strip, then slightly lift the presser foot and slip the next strip under it. Then I keep stitching until the end of that row.
~
Now you have to look at the picture sideways - because blogger loves me and I can't seem to get it rotated right... no matter what I do to it. But this is my pile of 2 1/2 strips all stitched together.
~
After I have all of them stitched I go and clip the threads between and take them to the ironing board to press. On my quilt I pressed all the seams towards the dark fabric. I do this so that when it comes time to quilt it, the seams are hidden under the dark fabric and you don't get any shadowing on the quilt. But - you also need to understand I am not the perfectionist that I probably should be, so if they don't go this way- its alright.. really. Just take a deep breath and smile!
~
Again - blogger turned my picture... it must have something to do with the way I took it on the camera... cuz I rotated it in my photo deallie ( and yes deallie is a word - my hubby understands it, and a lot of the time he can fix them!)
~
So once you are done pressing them all, you lay the strips out on your cutting mat. When I first starting quilting I did one strip at a time, now I am a little bit more confident with the rotary cutter and will do up to 4 strips at a time. I layer the strips, then I trim off the end of the strip so it is even. Then I place my ruler every 2 1/2 inches and slice the pile. Essentially I am cutting 2 1/2 by 4 1/2 strips. I took a picture just in case this doesn't make sense.
~
*On the Width of fabric strips you should be getting 16 pieces per strip. On the Scrappy FQ option you should be getting 8 pieces per strip.
~
* when you are all done cutting these pieces you should have 168 pieces.. just in case you are one to count pieces ( grin).

~
So that is what we will do for today. If there are better ways to explain or describe what I am trying to describe - let me know. In my brain it makes sense... but sometimes the words don't come out just right. One good thing is that I will be there when I am teaching it to the Ladies Group and the Guild. So that is always a benefit for answering questions.
~
Have a super sewing day and evening... thunder is rolling in and I have a feeling the rain storm is not far behind!


Not so Top Secret Project Questions

I love it!! You all are so wonderful and ask the best questions!! This is really helpful to me! And exciting. So many of you are going to make a Quilt of Valor - I can't believe it. So the answers to the questions that have been asked:
~
What size will it be ( oops I knew I forgot something important): Finished size 57 x 66
~
What colors are the best? : This really is up to you. I have found that ALL soldiers like Red Whites and Blues. We had a female soldier that took a pink floral quilt and was so excited to find something girly in the military. The reds and blues are kind of gender unspecific - all soldiers appreciate them. Hopefully that doesn't confuse you more.
~
Do you want them finished or unquilted?:
I will take them either way if you would like us to deliver the quilts. If you would like to quilt them, or go thru http://www.qovf.org and choose a longarmer to have it quilted.. go for it. If you want to send it to me to be quilted - that is fine too. Just send the top and backing to me. Alycia Quilts... 31544 Hwy 34.... Kersey CO 80644
~
When is the delivery date?:
We are definitely scheduled for May 2009 - the chaplain is expecting us! But if things go our way and in our favor we may try for a mid year delivery in Sept or October. So I am Planning ahead for May.
~
When is the next step coming?:
Tonite.. I have to do the mom thing and take the kids to swim practice and we kind of pretend to work during the day... but I know the computer will need me this evening!
~
Thanks so much for participating. I can't tell you how this makes my heart happy. I feel like I am walking on air - and that is such a great way to start a day! You all have a wonderful one - see ya this evening!

Monday, June 02, 2008

Not so Top Secret Project Fabric & Cutting


Well Here it is Drawn out in EQ. Notice that it is a two color quilt. So there are many ways to do this. You can choose just two colors(OPTION ONE), You can choose two colors for the 4 patches, two other colors for the 16 patches and yet another for the border(OPTION TWO)... or you can do it like I did and choose Fat Quarters in two colorways.(OPTION THREE)
~
Mine are obviously Blues and Creams. I have decided that I really like the scrappy look so went with the Fat Quarters. The next one I make I am going to go with the 5 fabric options.


~
So Lets Get Started....
Yardage Requirements:
~~
OPTION ONE: Two Color Option
Dark: 2 3/8 yards
Light: 1 5/8 Yards


~~~~
OPTION TWO: 5 Color Option
Dark #1: 7/8 yards
Dark #2: 3/4 Yard
Dark #3: 3/4 Yards
Light #1: 7/8 yard
Light #2: 3/4 Yards


~~~~
OPTION THREE: Fat Quarters
Dark FQ's: 9 total
Light FQ's: 6 total
~~~~~~~~~~~~~~~~~~~~~~~~~~~~~~~~~~~~~~~~~~~~~~~~~~~~~~~~~~~~~~~~

So I hope you want cutting instructions in the same day. I know that Once I get my fabrics gathered I am all ready to cut... so we shouldn't waste the momentum!
CUTTING :

OPTION ONE ( two color option)
DARKS:
CUT: 11~ 2 1/2 Inch Width of Fabric Strips ( WOF)
: 5 ~ 4 1/2 inch WOF Strips
: 6 ~ 4 1/2 inch WOF strips for Outer Border
LIGHTS:
CUT: 11 ~ 2 1/2 in WOF Strips
: 5 ~ 4 1/2 in WOF Strips
~~
OPTION TWO (5 color option)
Dark #1: Cut 11 ~ 2 1/2 inch WOF Strips
Dark #2: Cut 5 ~ 4 1/2 inch WOF Strips
Dark #3: Cut 6 ~ 4 1/2 inch WOF Strips
~
Light #1: Cut 11 ~ 2 1/2 inch WOF Strips
Light #2: Cut 5 ~ 4 1/2 inch WOF Strips
~~
OPTION THREE ( Fat Quarters)
Cut these lengthwise so you will get 21 or 22 inch long strips.
Darks:
*Take 4 FQ's, Stack them up and cut 1~ 4 1/2 strip, and 5~ 2 1/2 inch Strips all 22 in long
*Take 1 FQ and cut 3 ~ 4 1/2 in strips and 1 ~ 2 1/2 inch strip.
*Take 4 FQ's , Stack them up and cut 4 ~ 4 1/2 inch strips from each - set aside 12 of the 4 1/2 inch strips for the border.
Lights:
*Take 4 FQ's, Stack them up and cut 1~ 4 1/2 strip, and 5~ 2 1/2 inch Strips all 22 in long
*Take 1 FQ and cut 3 ~ 4 1/2 in strips and 1 ~ 2 1/2 inch strip.
*Take 1 FQ and cut 4 ~ 4 1/2 inch strips from each.
~~

So... hopefully that will keep you busy for a minute.
Have fun - and thanks for joining in!